Clocktower puzzles
Clock Lens in Escape Academy 2: Back 2 School
The lens in the Escape Academy 2: Back 2 School Demo belongs to the upper Clocktower’s clock-and-sundial apparatus. With it fitted, point the large clock hand at a number and read the letter indicated by the shadow below. You are looking through the back of the clock face, which explains the apparently reversed Roman numerals. The developer’s confirmed example is 9 → A.
On this page
Have the lens before decoding
If you have not obtained a lens from the sun-box task, finish the season and E/W sun-box clues first. The boxes and the letter decoder are connected stages, not alternative ways to solve the same lock.
A small hint before the explanation
The big clock supplies a number. The dial below supplies a letter. The lens makes those two clues work together; it is not a magnifying glass for reading the Roman numerals.
Fit the lens and follow the light
- Inspect the clock-and-sundial apparatus on the upper floor and use the lens at its matching item slot.
- Look at the rotating arm of the large clock. In the reviewed recording, the installed circular lens is on that arm and sends light toward the sundial below.
- Rotate the large clock hand to a number you need to decode.
- Read the letter indicated by the resulting shadow on the sun clock, and write down the number–letter pair.
The exact insertion button depends on your current controls; follow the apparatus’s interaction prompt. The lens sits in the clock apparatus above the letter dial. Do not try to use its light as a new sun-box height clue.
Why IX can look like XI
The clock face normally makes sense to someone outside the tower. You are inside, looking at its reverse through the glass. Reading the visible strokes from your left to right can turn the intended IX (9) into something that looks like XI (11).
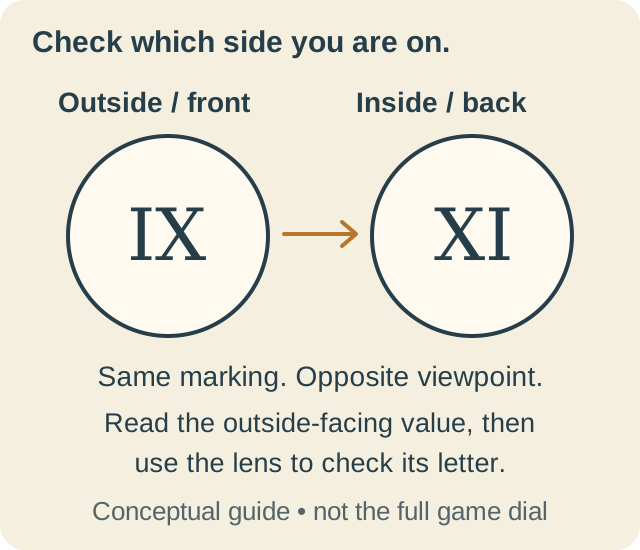
Show the practical reading check
Imagine reading the same glass from outside. Identify the intended clock number from that side rather than treating the inside-facing characters as a scrambled list. The developer explicitly explains that the clock units are in order.
Use 9 → A as your check. If you believe you have selected nine but the shadow does not give A, check which side of the numeral you read and which number the hand actually points to.
Build only the mapping you need
Take the numbers from the bell plaque and decode each distinct number with the apparatus. There is no need to guess a letter by counting alphabetically around the room. Reuse a recorded pair whenever its number appears again.
The reviewed recording briefly calls nine D, then corrects it to A after recognising the inside viewpoint. Do not carry that early guess into your notes. The developer also confirms A independently.
If you can read letters but the bell attempt fails, check the written order and repeated numbers next. That is a different problem from obtaining or fitting the lens.
When this step is complete
You can select an intended clock number and read its shadow letter, with nine giving A. Keep your mapping beside the room’s number clue; you are ready to translate the bell sequence.
Sources & version
Primary explanation: Freezman’s June 15 Clocktower replies (OP and all four replies reread November 3, including lens, shadow, back-facing clock and 9=A).
Creator context: YouTube: Fyrestrike, 1:15:13–1:17:27. Relevant transcript and decoded paused frames at 1:16:30, 1:16:40, 1:16:50 and 1:17:00 were reviewed. They show the installed lens and light toward the dial; they do not show every insertion or co-op input. The recording’s build is unknown. The October 16 patch changed this level’s clueing and UX. No full-game playtest is claimed.